
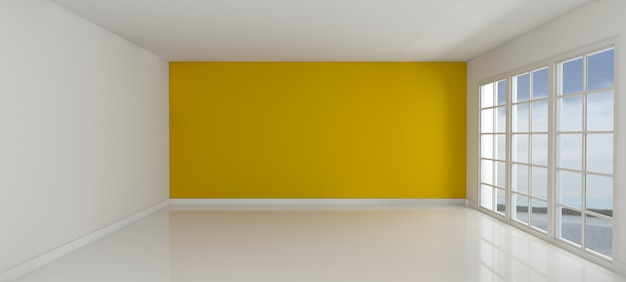
Your home is a reflection of your personality and style, and one of the easiest and most effective ways to transform the look and feel of your home is by upgrading your ceilings with ceiling coving. Ceiling coving adds an elegant touch to your rooms, adding depth and texture that enhances the overall beauty of your interiors.
In this post, we’ll explore how to install ceiling coving like a pro and unleash the elegance of your home.
Unleashing The Elegance Of Your Home With Ceiling Coving

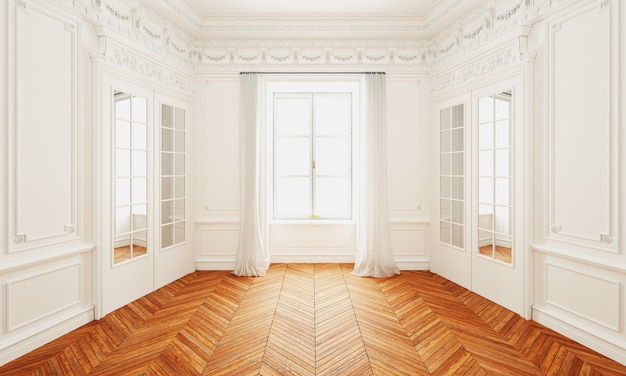
Ceiling coving is a decorative moulding that is installed at the point where the ceiling meets the wall. It adds a finishing touch to your room, adding depth, and creating a seamless transition between the ceiling and the wall.
Whether you are renovating your home or building a new one, adding ceiling coving is a simple yet effective way of enhancing the beauty of your interiors. With just a few tools and some basic knowledge, you can create an elegant and timeless look that will last for years to come.
Upgrade Your Ceilings With Ceiling Coving

When it comes to home decor, the little details can make a big difference. Ceiling coving is one such detail that transforms your ceilings from basic to beautiful. It adds character and interest to your rooms, making them feel more complete and polished.
Ceiling coving is not only aesthetically pleasing, but it also serves a functional purpose. It hides any imperfections between the ceiling and the wall, giving your room a seamless finish. It also protects your walls from wear and tear.
Enhancing The Beauty Of Your Interiors With Ceiling Coving
Ceiling coving is available in a variety of styles, sizes, and shapes. From simple and elegant to intricate and ornate, there is a style that will suit your taste and decor. You can choose from classic designs like egg and dart, or go for a modern look with sleek lines and minimalist shapes.
The key to choosing the right ceiling coving is to ensure that it complements the style of your home. If you have a traditional or vintage-style home, opt for designs that are ornate and elaborate. If your home has a contemporary or modern style, choose sleek and simple designs that accentuate the clean lines of your interior.
How To Install Ceiling Coving Like A Pro

Installing ceiling coving is a relatively simple process that can be done in a weekend. To ensure that your installation looks professional, follow these steps:
Step 1: measure the length of the wall where you will be installing the coving. Add a few extra inches to allow for any mistakes or adjustments.
Step 2: cut the coving to the desired length using a saw or a sharp knife.
Step 3: apply adhesive to the back of the coving, making sure that it is evenly spread out.
Step 4: press the coving onto the wall, starting at one end and working your way to the other.
Step 5: secure the coving in place using nails or screws.
Step 6: fill in any gaps or holes using filler or putty.
Step 7: sand down any rough edges or imperfections using sandpaper.
Step 8: paint or varnish the coving to match the rest of the room.
Mastering The Art Of Ceiling Coving Installation

While the process of installing ceiling coving is relatively simple, there are a few tips and tricks that can help you master the art of installation.
Tip 1: use a level to ensure that your coving is aligned and straight.
Tip 2: choose an adhesive that is specifically designed for ceiling coving. This will ensure that it sticks well and lasts long.
Tip 3: don’t rush the installation process. Take your time to ensure that the coving is properly aligned and secured.
Tip 4: sand down any rough edges or imperfections using fine-grit sandpaper. This will ensure that the coving is smooth and looks professional.
Expert Tips For Installing Ceiling Coving With Ease
To install ceiling coving like a pro, follow these expert tips:
Expert tip 1: make sure that your tools are sharp and in good condition. This will ensure that your cuts are precise and clean.
Expert tip 2: if you are working with long pieces of coving, have someone help you hold it in place while you secure it to the wall.
Expert tip 3: use filler or putty to fill in any gaps between the coving and the wall. This will ensure that the finished installation looks seamless and polished.
Expert tip 4: use a caulking gun to apply adhesive to the back of the coving. This will ensure that the adhesive is distributed evenly and accurately.
Installing Ceiling Coving: A Step-By-Step Guide
To install ceiling coving, follow these step-by-step instructions:
Step 1: measure the length of the wall where you will be installing the coving. Add a few extra inches to allow for any mistakes or adjustments.
Step 2: cut the coving to the desired length using a saw or a sharp knife.
Step 3: apply adhesive to the back of the coving, making sure that it is evenly spread out.
Step 4: press the coving onto the wall, starting at one end and working your way to the other.
Step 5: secure the coving in place using nails or screws.
Step 6: fill in any gaps or holes using filler or putty.
Step 7: sand down any rough edges or imperfections using sandpaper.
Step 8: paint or varnish the coving to match the rest of the room.
Transforming Your Ceilings With Creative Ceiling Coving Solutions

Ceiling coving is one of the easiest and most effective ways to transform the look and feel of your home. With a variety of styles and designs to choose from, you can create a unique and custom look that reflects your personality and style.
Whether you are renovating your home or building a new one, ceiling coving is a simple yet timeless addition that will add elegance and sophistication to your interiors. So go ahead and unleash the beauty of your home with creative ceiling coving solutions.


